
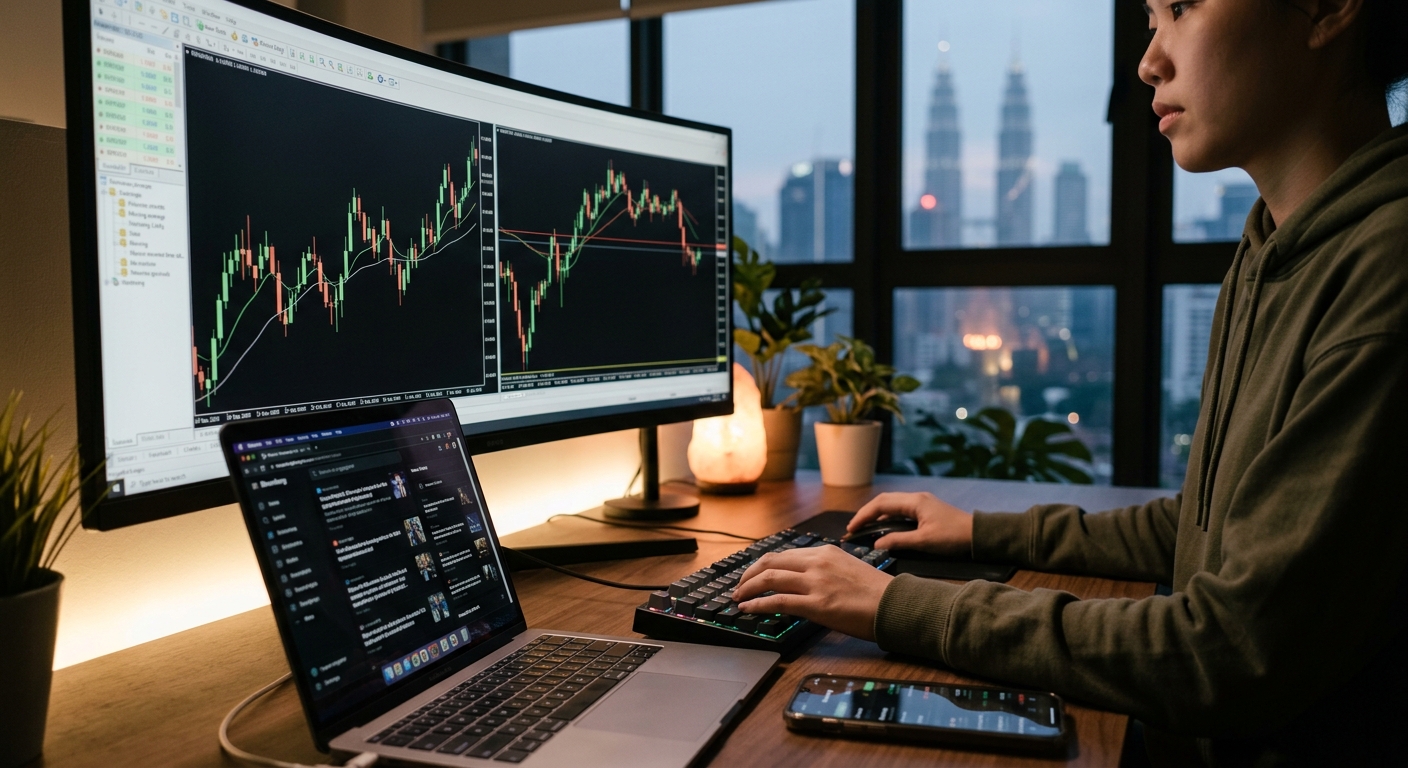
Step by Step: Make Forex Trading Photographs and Premium High-Res Photos
Professional imagery has become an important component of financial communication. A brokerage website, educational platform, market-analysis publication, or social-media campaign can use photography to transform an abstract subject such as currency trading into something immediately recognizable.
Charts, currencies, trading terminals, illuminated screens, notebooks, and sophisticated workspaces can all communicate the atmosphere of financial markets. Yet producing convincing imagery requires more than pointing a camera at a monitor. Composition, lighting, perspective, color management, technical resolution, and contextual accuracy all influence whether a photograph looks genuinely professional or merely resembles a generic stock image.
This guide explains how to create polished forex-themed photographs from the initial concept through capture, editing, and high-resolution delivery. It also explores how to create commercially useful trading forex pictures without making the imagery visually cluttered or misleading.
Why Professional Forex Photography Matters
Foreign exchange is inherently abstract.
Currencies are traded electronically, prices change continuously, and much of the activity takes place through software rather than a physical exchange floor. Photography therefore has an unusual challenge: it must give a visual form to an essentially digital environment.
A well-produced image can bridge that gap.
A photograph showing a carefully arranged trading workstation can suggest concentration, analysis, technology, and financial decision-making. A close-up of a keyboard beside a currency chart can create a more intimate editorial atmosphere. Conversely, an expansive photograph of multiple monitors can communicate scale and technological sophistication.
The strongest images do not merely show equipment.
They create context.
Step 1: Define the Purpose of the Photograph
Before setting up a camera, determine where the photograph will be used.
A website hero image has different requirements from a blog thumbnail, advertising banner, presentation slide, or editorial article.
Consider:
- Website headers
- Financial blogs
- Educational materials
- News articles
- Social-media posts
- Presentations
- Brochures
- Advertising campaigns
- Digital publications
The intended application determines the ideal composition.
For example, a website banner may require considerable negative space on one side so that text can be placed over the image. A square social-media image can use a much tighter composition.
This preliminary decision prevents a common mistake: producing a beautiful photograph that cannot be conveniently used in its intended format.
Step 2: Develop a Visual Concept
The subject should be established before the camera is switched on.
Possible concepts include:
The Professional Trading Desk
A sophisticated workstation featuring several monitors, a keyboard, mouse, notebook, and carefully arranged financial documents.
The Analytical Workspace
A more restrained composition centered around charts, a laptop, handwritten notes, and analytical tools.
Currency-Focused Photography
Physical banknotes, currency symbols, coins, or international financial objects arranged in a visually coherent composition.
Technology and Markets
A modern computer display showing abstract financial data, surrounded by subdued technological elements.
Human-Centered Trading
Hands interacting with a keyboard or mouse while market information appears on a monitor.
Each concept communicates something different.
A premium photograph should have an intentional visual narrative rather than simply containing objects associated with forex.
Step 3: Choose the Right Equipment
High-resolution photography does not necessarily require the most expensive camera available.
A modern mirrorless or DSLR camera with a high-quality lens can produce excellent results. What matters most is the combination of sensor quality, lens sharpness, lighting, stability, and careful technique.
Useful equipment includes:
- High-resolution camera
- Sharp prime or professional zoom lens
- Stable tripod
- External lighting
- Diffusers
- Reflectors
- Remote shutter
- Color calibration tools
- High-speed memory cards
A tripod is particularly useful for still-life compositions.
It allows the photographer to refine the arrangement without worrying about camera movement.
Step 4: Select an Appropriate Lens
Lens selection significantly affects the character of a photograph.
A wide-angle lens can capture an entire trading environment and create a sense of spaciousness. However, excessive wide-angle distortion can make monitors, keyboards, and desk edges appear unnatural.
A standard or short-telephoto lens often produces a more natural perspective.
For close-up details, a macro lens can reveal intricate textures in:
- Currency
- Keyboard keys
- Printed charts
- Coins
- Electronic components
- Notebook pages
The lens should support the intended visual language rather than merely magnify the subject.
Step 5: Prepare the Trading Environment
A convincing photograph begins with a convincing environment.
Clean the workspace before shooting.
Remove unnecessary cables, empty cups, packaging, unrelated papers, and distracting objects. At the same time, avoid making the environment so sterile that it looks artificial.
A carefully controlled degree of realism is preferable.
Useful objects might include:
- Multiple monitors
- Laptop
- Keyboard
- Mouse
- Notebook
- Pen
- Financial calculator
- Currency notes
- Desk lamp
- Headphones
The arrangement should feel functional.
A workspace that looks excessively staged can undermine the credibility of the photograph.
Step 6: Arrange the Monitors Carefully
Monitors are often the visual centerpiece of forex photography.
Their placement should create depth without overwhelming the composition.
Instead of arranging every screen at exactly the same angle, consider subtle variations.
One monitor might display a chart while another shows a generalized market dashboard. A third could remain intentionally darker or slightly out of focus.
This creates hierarchy.
It is also important to avoid filling every screen with competing information. Too many graphs, numbers, and colored indicators can make the image visually chaotic.
Minimalism can be more powerful.
Step 7: Use Appropriate Screen Content
When photographing trading screens, the displayed information should look plausible and visually coherent.
Charts can include:
- Candlestick patterns
- Price movements
- Trend lines
- Volume information
- Market dashboards
- Currency pairs
However, screen content should not be presented in a way that falsely implies guaranteed financial outcomes or fabricated performance.
For commercial photography, generic or intentionally designed interface graphics can sometimes be preferable to real trading accounts.
This provides greater control over the visual composition while avoiding the accidental disclosure of sensitive account information.
Step 8: Control Reflections
Photographing computer screens introduces a technical problem: reflections.
Monitors are reflective surfaces, and bright lights can appear as distracting white patches across the display.
Avoid placing powerful lights directly opposite the monitor.
Instead, position illumination at an angle.
Polarizing filters can sometimes help, depending on the screen and shooting conditions, although they should not be treated as a universal solution.
The objective is to maintain enough screen visibility for the displayed content to remain legible while preserving the surrounding atmosphere.
Step 9: Build a Sophisticated Lighting Setup
Lighting is one of the strongest determinants of perceived image quality.
A simple three-part lighting arrangement can work well:
Key light: establishes the primary illumination.
Fill light: reduces excessively deep shadows.
Rim or accent light: separates objects from the background and adds dimensionality.
For a premium financial aesthetic, lighting is often more restrained than in conventional commercial photography.
Soft directional illumination can create depth without making the workstation appear theatrical.
Step 10: Experiment With Low-Key Lighting
Low-key photography can be particularly effective for financial subjects.
A darker environment with carefully controlled highlights can create an atmosphere of concentration and technological sophistication.
For example, the monitors may provide a subtle glow while a soft light illuminates the keyboard and hands.
The resulting image can feel cinematic without becoming excessively dramatic.
The important distinction is between controlled darkness and underexposure.
Shadows should contain information.
Step 11: Use Color Strategically
Color can influence how an audience interprets a financial photograph.
Cooler tones can suggest:
- Technology
- Precision
- Data
- Modernity
Warmer tones can suggest:
- Human interaction
- Confidence
- Traditional finance
- Physical currency
A restrained combination of neutral tones and carefully controlled accent colors often produces a sophisticated result.
Avoid excessive saturation.
Premium commercial photography tends to rely on tonal subtlety rather than chromatic exuberance.
Step 12: Introduce Human Elements
A completely empty trading desk can look polished, but human presence can make the image more relatable.
Hands are particularly useful.
A hand resting near a mouse, typing on a keyboard, writing notes, or adjusting a monitor can communicate activity without requiring a visible face.
This is useful for editorial photography because it allows the audience to imagine themselves within the scene.
The human element should remain natural.
Avoid exaggerated gestures that make the photograph resemble an advertisement for financial success.
Step 13: Compose With Negative Space
Negative space is one of the most valuable tools in commercial photography.
An empty region of the frame gives designers room for:
- Headlines
- Captions
- Logos
- Calls to action
- Article titles
For example, the workstation could occupy the right side of a wide horizontal photograph while the left side remains relatively uncluttered.
This is particularly useful for website hero imagery.
A photograph should not merely look good in isolation. It should remain functional when integrated into a larger design.
Step 14: Capture Multiple Perspectives
Do not rely on a single composition.
Create a visual series.
Capture:
- Wide workstation views
- Medium desk compositions
- Close-ups of screens
- Keyboard details
- Hands interacting with equipment
- Currency close-ups
- Overhead perspectives
- Side-angle compositions
Different perspectives serve different editorial purposes.
A wide image may work as a website banner, while a close-up can become a blog thumbnail.
Creating a diverse library from one carefully prepared setup is considerably more efficient than rebuilding the scene for every image.
Step 15: Photograph Physical Currency Carefully
Banknotes can provide immediate visual recognition.
However, physical currency is visually complex. Fine patterns, typography, portraits, holographic elements, and security features can compete for attention.
Use shallow depth of field when appropriate.
A currency note in the foreground can remain sharp while the trading workstation behind it becomes softly blurred.
This establishes a visual relationship between physical money and digital markets.
The photograph becomes more conceptual.
Step 16: Create Depth With Layering
Flat compositions can look ordinary.
Layering creates depth.
A useful arrangement might include:
Foreground: currency, notebook, or keyboard.
Middle ground: hands, mouse, or laptop.
Background: monitors displaying financial information.
Different focal planes produce a more immersive image.
Depth of field can then be used to guide the viewer’s attention.
Step 17: Capture at the Highest Practical Resolution
Premium imagery requires sufficient resolution for its intended use.
Shoot in the camera’s highest-quality format where possible.
RAW capture is particularly useful because it preserves substantial information for later editing.
High-resolution originals provide flexibility.
A single source image can potentially be cropped into:
- Horizontal banners
- Square images
- Vertical social-media graphics
- Presentation images
- Website thumbnails
Cropping flexibility is one of the major benefits of high-resolution photography.
Step 18: Pay Attention to Image Sharpness
A premium photograph should exhibit deliberate sharpness.
Use a tripod for static scenes.
Select an appropriate aperture rather than automatically shooting wide open.
For complex scenes, focus stacking may even be useful if extremely high depth of field is required.
At the same time, not everything needs to be sharp.
Selective focus can create hierarchy and make the image feel more sophisticated.
Step 19: Edit With Restraint
Post-production should enhance the photograph rather than disguise its shortcomings.
Typical adjustments include:
- Exposure
- White balance
- Contrast
- Highlights
- Shadows
- Sharpness
- Noise reduction
- Lens correction
- Cropping
Color grading can establish a consistent visual identity across an entire collection.
Avoid excessive clarity, artificial glow, or exaggerated HDR effects.
Such treatments can make a photograph appear synthetic.
Step 20: Optimize Screen Images
One of the most difficult aspects of trading photography is making digital displays look natural.
A screen can appear significantly brighter or darker than the surrounding environment.
Adjust exposure carefully.
In some situations, multiple exposures can be combined to preserve both the monitor information and the surrounding scene.
The result should retain detail without producing glowing screens that dominate the entire image.
Step 21: Create Authentic-Looking Trading Forex Pictures
Professional trading forex pictures should communicate the subject without becoming stereotypical.
Common visual clichés include:
- Excessive piles of cash
- Overly dramatic green and red arrows
- People staring intensely at dozens of monitors
- Unrealistic profit figures
- Lavish luxury settings
- Artificially glowing charts
These elements can make an image appear generic.
A more credible approach is understated.
Show the environment.
Show the analytical process.
Show technology, documentation, charts, and concentration.
Authenticity usually produces stronger editorial imagery than visual exaggeration.
Step 22: Consider the Difference Between Editorial and Commercial Images
The intended licensing context can influence the shoot.
Editorial images often benefit from realism and contextual detail.
Commercial images generally require greater control over branding, interfaces, logos, people, and intellectual property.
If recognizable individuals appear in commercial photography, appropriate permissions may be required.
Similarly, visible company logos, proprietary trading interfaces, and copyrighted materials can introduce complications.
A clean, controlled environment simplifies later use.
Step 23: Build a Consistent Photo Collection
One excellent photograph is useful.
A coherent collection is more valuable.
Maintain consistency in:
- Lighting
- Color
- Composition
- Subject matter
- Resolution
- Camera quality
- Editing style
A financial publication can then use multiple images without creating an inconsistent visual identity.
For example, a complete collection might contain:
- Wide trading workstation
- Close-up of market chart
- Hands using keyboard
- Currency detail
- Analyst reviewing data
- Laptop and notebook
- Abstract financial technology composition
Together, these photographs create a versatile visual library.
Step 24: Prepare Images for Different Platforms
A high-resolution master file should be retained separately from web-optimized versions.
Create suitable derivatives for:
- Websites
- Mobile pages
- Social media
- Presentations
- Email newsletters
Do not repeatedly overwrite the original.
Maintaining a high-quality master ensures that future crops and exports remain possible.
Metadata can also be useful for organizing a large image collection.
Step 25: Think Beyond Conventional Photography
Forex imagery does not have to be limited to photographs of desks and computer screens.
Conceptual photography can be equally powerful.
Ideas include:
- Currency reflections on glass
- Abstract reflections of charts
- Macro photography of banknote textures
- Long-exposure technology scenes
- Geometric arrangements of currencies
- Shadows falling across financial documents
- Multiple screens reflected in a polished surface
Such compositions can make financial content feel more editorial and sophisticated.
The Principles of Premium Financial Photography
High-quality forex photography ultimately depends on several fundamental principles.
Accuracy
The visual environment should appear credible.
Composition
Every object should have a reason to occupy the frame.
Lighting
Light should create dimensionality and visual hierarchy.
Resolution
The original should contain enough detail for multiple applications.
Restraint
Sophistication rarely requires excessive visual effects.
Context
The photograph should communicate something about markets, analysis, technology, or financial activity.
Versatility
Whenever possible, compositions should support multiple formats and editorial applications.
Final Thoughts
Creating premium forex photography is an exercise in translating an intangible financial activity into a tangible visual language.
The strongest images do not simply display trading screens. They communicate an environment: analytical, technological, precise, and purposeful.
A successful workflow begins with a clear concept, followed by careful set design, appropriate equipment, controlled lighting, thoughtful composition, high-resolution capture, and restrained post-production.
From there, a single photographic session can produce an extensive library of trading forex pictures suitable for websites, educational materials, editorial publications, presentations, and other financial communications.
The essential principle is straightforward.
Make the image believable before making it spectacular.
A clean workstation, carefully illuminated monitor, subtle currency detail, realistic chart, and well-composed human interaction can communicate considerably more than a crowded image filled with artificial effects.
Premium financial photography is ultimately about visual precision. The details matter. The light matters. The perspective matters. And when those elements are orchestrated carefully, an abstract subject such as currency trading can acquire a compelling and highly tangible visual identity.


You May Also Like

Just in Case: When Not Everything Is Just in Time
MetaTrader 4 Platform for Forex Trading and Technical Analysis
